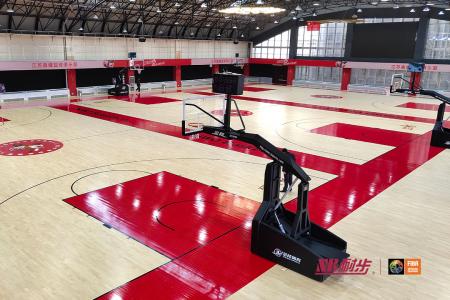
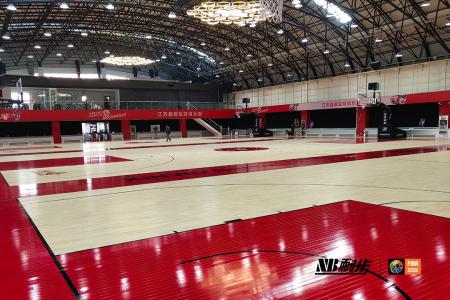
How to professionally install solid wood sports wood flooring: detailed steps and tips

The installation of solid wood sports wood flooring is not just about laying wooden boards, it involves multiple steps and details, each of which may affect the final use effect and service life. This article will introduce in detail every step of the installation of solid wood sports wood flooring, from preparation to final installation, as well as the key points and techniques that need to be paid attention to during the installation process.
1. Preparation
1.1 Material preparation
Before installing solid wood sports wood flooring, you must first prepare all materials and tools. Mainly include:
- Solid wood sports wood flooring
- Moisture-proof mat
- Keel
- Nails and screws
< p>- Cutting tools (such as electric saw)- Level
- Measuring tools (such as tape measure)
1.2 Treatment of basic ground
< p>Basic ground treatment is an important step in installing solid wood sports wood flooring. First, make sure the foundation floor is dry and flat. If the ground is uneven, it needs to be leveled to avoid subsequent installation problems. In addition, if the humidity of the basic floor is too high, moisture-proof treatment is required to ensure that the wooden floor will not deform due to moisture during use.1.3 Adaptation of materials
Solid wood floors need to be adapted before installation, that is, the wooden floors are placed at the construction site for a period of time (usually 48 hours) to adapt to the temperature of the site. Humidity environment. This step can effectively reduce the deformation and cracking of the wooden floor due to environmental changes after installation.
2. Installation steps
2.1 Install moisture-proof mat
The function of moisture-proof mat is to prevent ground moisture from intruding into the wooden floor, thereby extending the service life of the wooden floor. When laying the moisture-proof mat, make sure that the moisture-proof mat covers the entire floor, and the joints must be sealed to prevent moisture from entering through the gaps.
2.2 Installing the keel
The keel is an important structure that supports the wooden floor. Its installation quality directly affects the flatness and stability of the wooden floor. When installing keels, a reasonable layout should be carried out according to the size and shape of the room to ensure that the spacing between keels is even, generally 30-40 cm. When fixing the keel, use screws or nails and make sure the keel is firmly fixed and will not become loose.
2.3 Laying solid wood sports wood flooring
When laying wooden flooring, start from one side of the room and lay it piece by piece. During installation, use measuring tools to ensure that each piece of wood flooring is in the correct position and angle. There should be a certain gap (usually 1-2 mm) between each wooden floor to prevent the wooden floor fromThe board deforms due to thermal expansion and contraction.
2.4 Fixing the wooden floor
After laying the wooden floor, use special nails or screws to fix the wooden floor to the keel. When fixing, pay attention to the angle and depth of the nails to ensure that the nails fully enter the keel and will not affect the appearance and use of the wooden floor.
3. Follow-up processing
3.1 Grinding and polishing
After the wooden floor is laid, it needs to be sanded and polished to ensure the smoothness of the wooden floor surface. and smooth. This step requires the use of a special grinder and polisher. Pay attention evenly when grinding to avoid unevenness on the surface of the wooden floor.
3.2 Painting and maintenance
After sanding and polishing, you can choose the appropriate floor paint for painting as needed. When painting, pay attention to the thickness and uniformity of the paint layer to ensure the beauty and durability of the wooden floor. After painting, perform proper maintenance and avoid heavy lifting or strenuous exercise while the paint is still wet.
4. Frequently Asked Questions and Solutions
4.1 Deformation of Wooden Floors
During use, solid wood sports wood floors may deform due to changes in environmental humidity. situation. In order to avoid this situation, moisture-proof treatment should be carried out before installation, and the indoor humidity should be kept stable during use. If deformation occurs, it can be solved by adjusting the indoor humidity or performing local repairs.
4.2 Cracks in wooden floors
Cracks in wooden floors are generally caused by insufficient seams during installation or quality problems of the wooden floor. When installing, make sure there are enough gaps between each piece of wood flooring and choose reliable quality wood flooring materials. If cracks occur, they can be partially replaced or repaired with caulk.
4.3 Loose wooden floors
Loose wooden floors may be caused by the keels not being firmly fixed or being used for too long. During installation, ensure that the keels are firmly fixed, and regularly check and maintain the use of the wooden floor. If looseness is found, it can be reinforced or replaced.
5. Summary
The installation of solid wood sports wood flooring requires professional technology and experience, and every step needs to be handled carefully to ensure the final use effect and service life. Through the detailed introduction in this article, I believe everyone has a deeper understanding of the installation of solid wood sports wood flooring. In actual operation, it is recommended to ask a professional construction team to install it to ensure the quality and use effect of the wooden floor.

