Nbfloor sports flooring installation guide to create a perfect indoor sports space
In today's society, more and more people are paying attention to health and exercise, and the selection and installation of sports flooring is also an important part of building an ideal sports environment. As a well-known brand of sports flooring, Nbfloor has become the first choice for many gyms, gymnasiums and other places with its high-quality materials and professional installation technology. Next, we will discuss the installation process of Nbfloor sports flooring in detail to help you create a comfortable and safe sports space.
1. Preparation work before installation
Before installing Nbfloor sports flooring, adequate preparation work is the key to success. First, ensure that the installation area is clean and dry, remove dust, oil stains and other impurities on the ground, and ensure that the ground is flat. If the ground is found to be uneven, it needs to be leveled. At the same time, you also need to ensure that the ambient humidity is within a suitable range to avoid deformation or cracking after installation.
Next, you need to prepare the installation tools and materials. Commonly used tools include: tape measure, cutting knife, hammer, leveling tools, etc. In addition, you need to prepare various accessories for Nbfloor sports flooring, such as laying mats, glue, skirting lines, etc.
2. Floor material selection and design layout
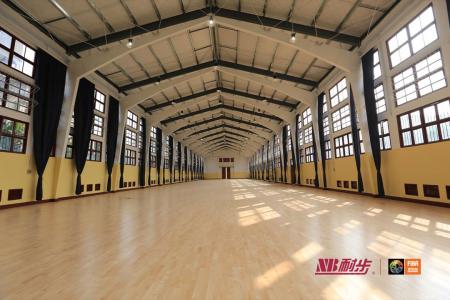
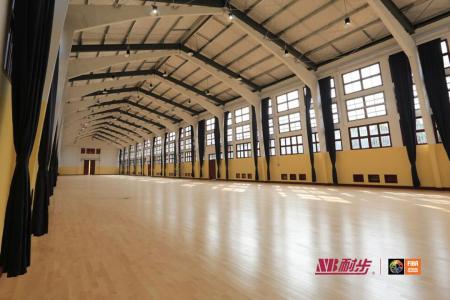
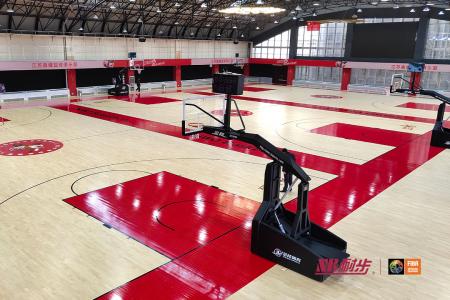
In the installation process of sports flooring, material selection and design layout are equally important. Nbfloor's sports floors are usually made of polyvinyl chloride (Vinyl), natural rubber, wood and other materials, which can provide good elasticity and shock absorption properties. When choosing flooring materials, you need to choose the right flooring according to the type of sport (such as basketball, badminton, fitness, etc.) to improve sports performance and safety.
When designing the layout, reasonable planning can be made based on the actual conditions of the site. For example, the sports field is divided into different areas to accommodate multiple sports needs. For some multi-purpose rooms, you can adopt a modular design to facilitate flexible adjustment of the space.
3. Detailed explanation of installation steps
3.1 Installation of floor mats
Before officially laying Nbfloor sports flooring, you first need to prepare the laying mats. This is an important step as laying pads will better absorb impact, protect the floor and extend its life. Lay the paving mats flat on the ground and secure them with glue, making sure there are no gaps between each paving mat.
3.2 Cutting and laying of the floor
Next, cut the Nbfloor sports floor based on the measured data. Note that when cutting, ensure the accuracy of the size to avoid being too large or too small, which will affect the overall effect. The vehicle can be easily cut along the marked lines using a cutting knife.
When laying the floor, should start from one side of the room and work your way forward. The gap between each floor should be kept at 3-5 mm to allow the floor to expand and contract when the temperature changes. To ensure a secure connection, apply a moderate amount of glue to the edge of each floorboard.
3.3 Fixation and compaction
After the laying is completed, the floor needs to be compacted with heavy objects to ensure that it is tightly attached to the laying pad. This process improves the stability of the floor and prevents it from loosening or deforming during daily use. Normally, the compaction time needs to be maintained for more than 24 hours to ensure that the glue is completely dry before proceeding to the next step.
3.4 Install the baseboards
The last step is to install the baseboards. Baseboards can not only beautify the indoor environment, but also protect the wall. During installation, the baseboard needs to be cut according to the height of the wall, and then fixed to the junction of the wall and floor with nails or glue to ensure a perfect visual effect.
4. Maintenance and inspection after installation
After installation is completed, maintenance and inspection cannot be ignored. Before the initial opening of the sports area, adequate ventilation should be provided to avoid affecting the air quality due to incomplete drying of the glue. In the first few days after the sports floor is laid, try to avoid heavy objects falling on the floor to avoid indentation or damage.
At the same time, regular cleaning and maintenance of the floor is an important means to extend its service life. Use neutral detergent when cleaning and avoid using strong acidic or alkaline detergents to avoid damage to the floor.
Conclusion
Every aspect of the installation process of Nbfloor sports flooring is crucial, from preparation and material selection to installation and subsequent maintenance. By understanding and following these processes, you can successfully create an indoor exercise space that is safe, comfortable, and beautiful. I hope this article can provide valuable help for your sports floor installation and make your sports life more colorful.